Editing Guide
The editor is where a match turns into a finished cut. After processing (or as you clip manually), every point sits on a timeline ready to review: trim the timing, tag what happened, star the best plays, add replays and text overlays, then export.
The Editor Layout
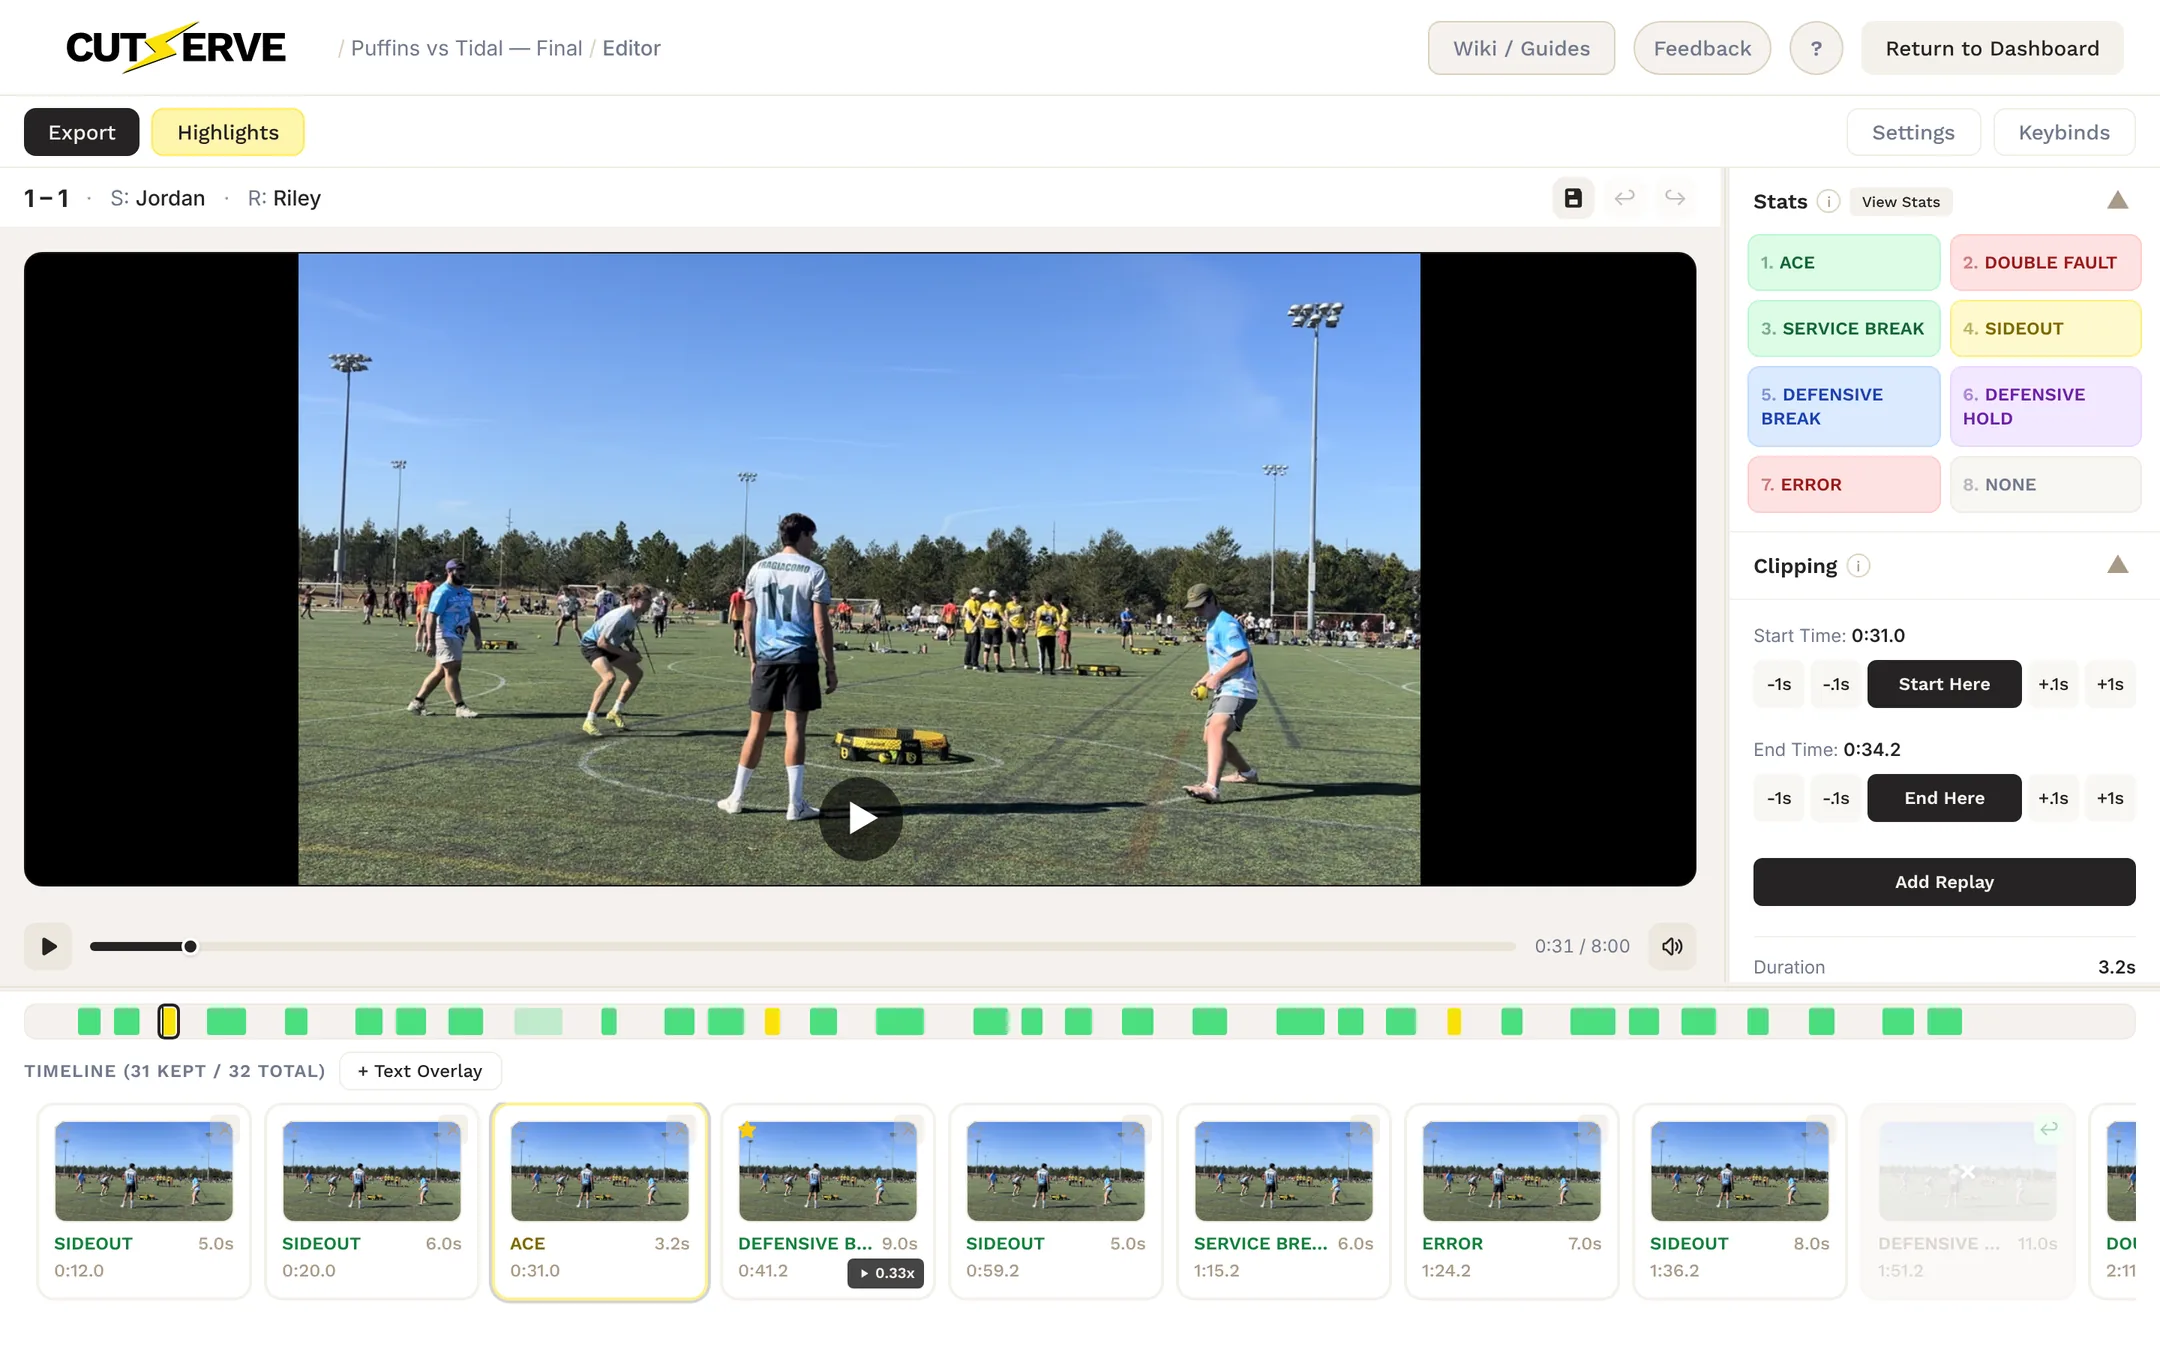
The editor has five main areas:
Toolbar (top)
Export opens Broadcast Studio and Highlights opens the Highlight Reel. Settings and Keybinds sit on the right.
Score bar
The current score, the server (S) and the receiver (R) for the selected point, plus Save, Undo and Redo.
Video player (center)
Plays the selected clip in a loop. Click the video or press Space to play and pause.
Right panel
Two collapsible sections: Stats (the eight stat buttons and View Stats) and Clipping (start/end controls and Add Replay).
Timeline (bottom)
An overview bar of the whole match plus a filmstrip of every clip, with its stat, length and timestamp. Click any clip to jump to it.
Manual Clipping Mode
If you chose Manual clipping at import, you start with an empty timeline instead of detected clips. There's no zone setup and no processing wait: you build the clip list yourself as you watch.
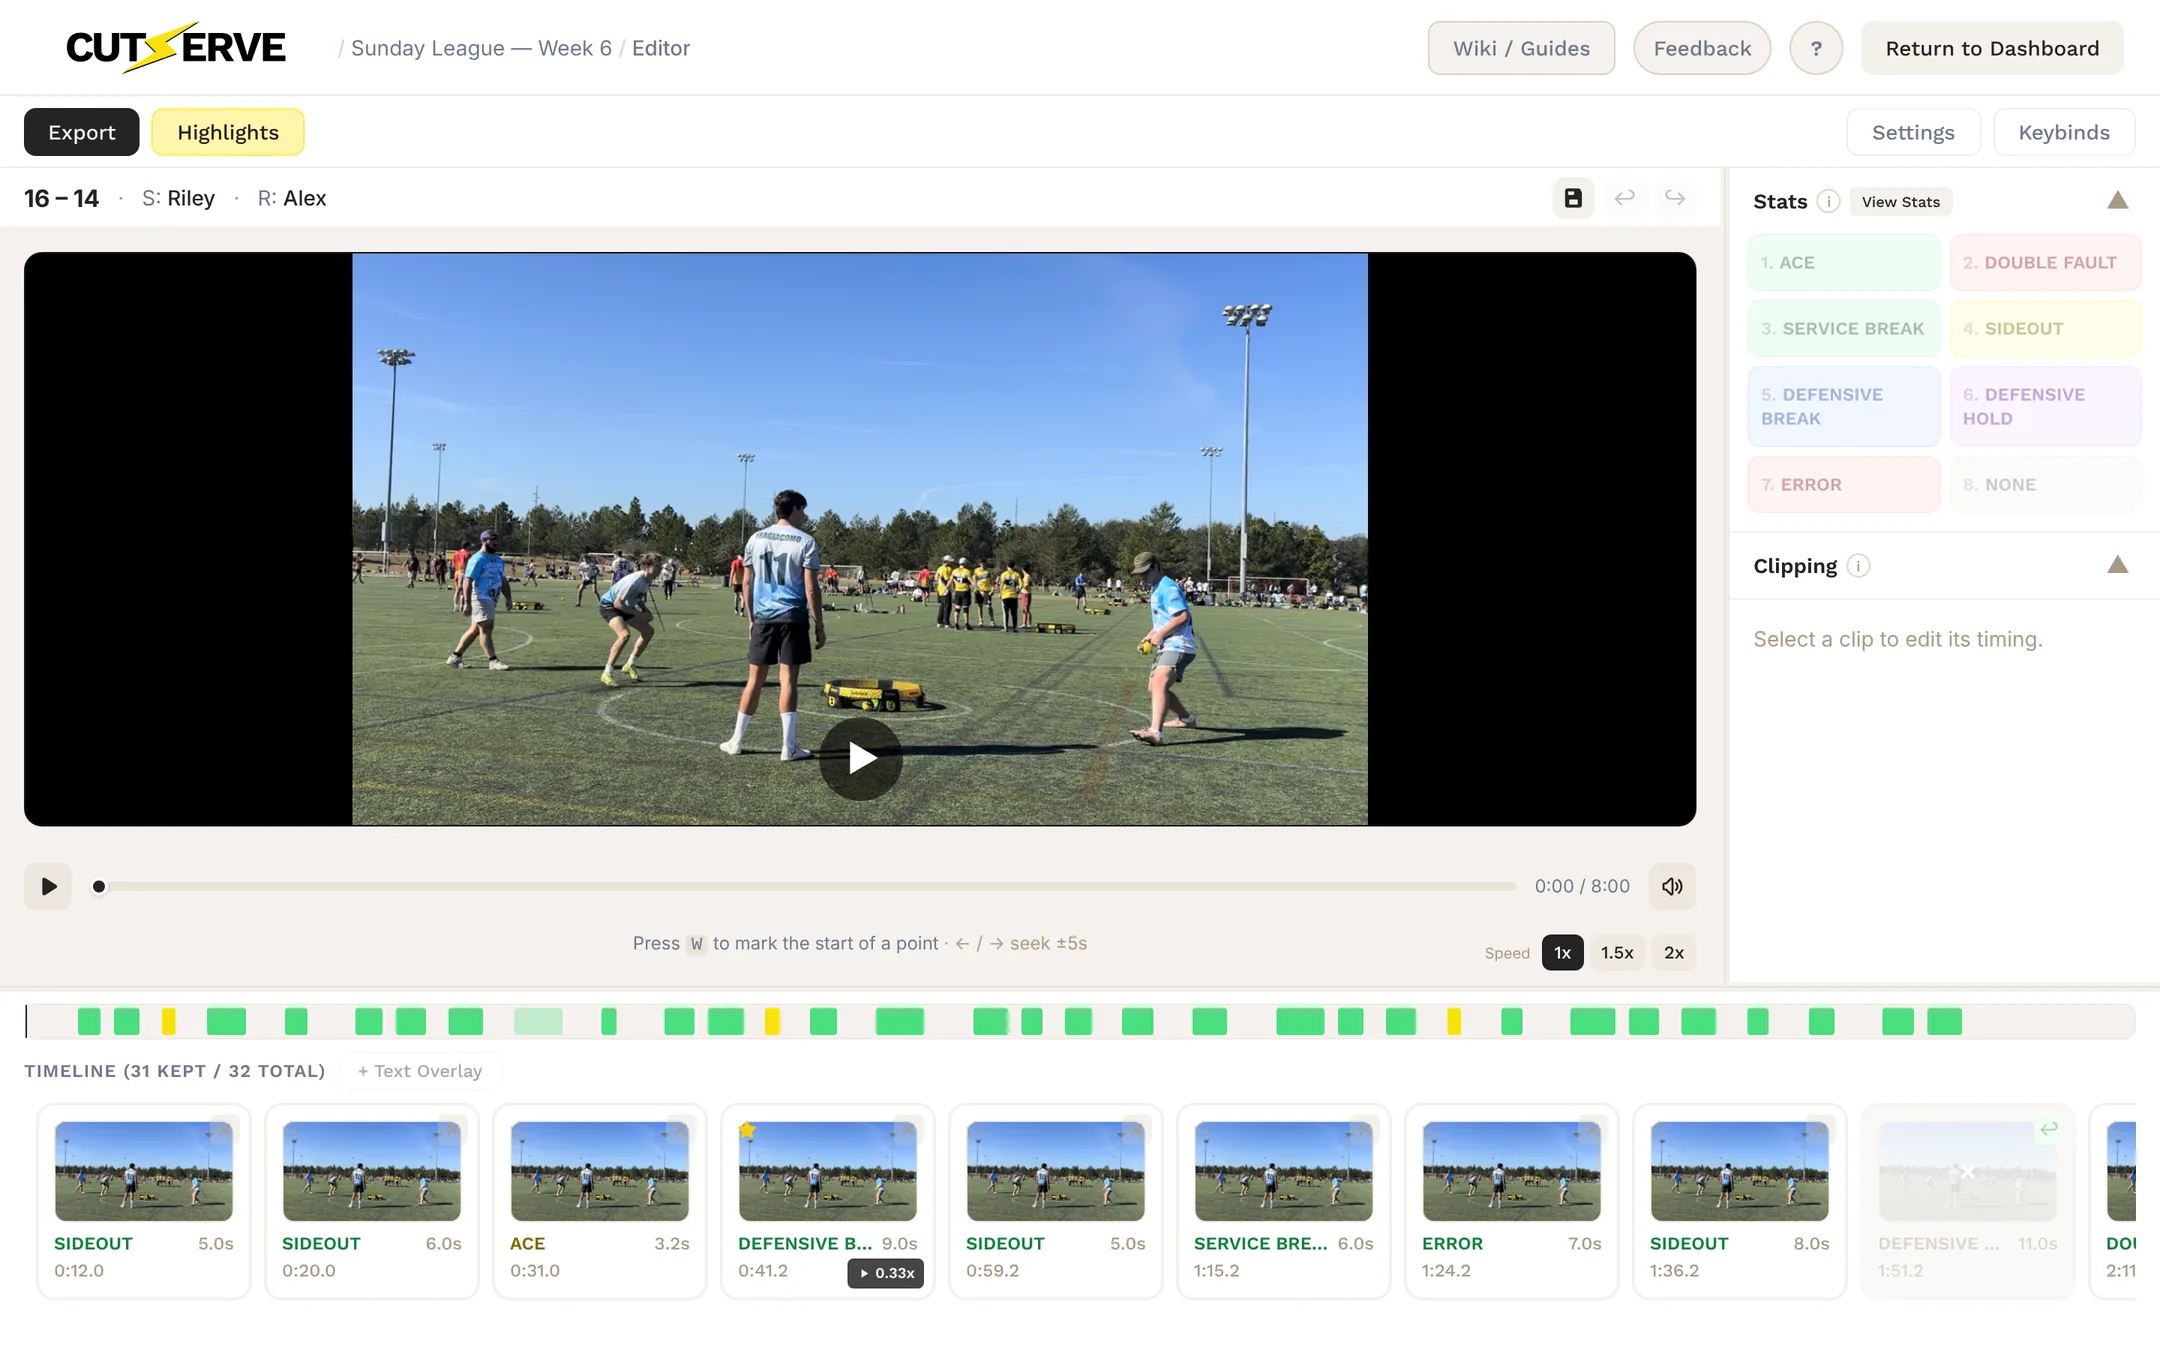
Play the footage and press W when a point starts and S when it ends. The new clip is added to the timeline, selected and looped so you can tighten it with Q/E and A/D.
| Key | Action |
|---|---|
| W | Mark the start of a point |
| S | Mark the end of the point and create the clip |
| ←/→ | Jump back or forward 5 seconds |
| Space | Play / pause |
Tag the clip with a stat (1–8) and playback resumes from the end of that point so you can capture the next one. Use the 1x, 1.5x and 2x buttons to watch faster, and press Esc to cancel a start you marked by mistake. If you go back to an earlier clip, Add Next Clip takes you back to where you left off. Everything else on this page works the same in both modes.
Navigating Clips
With the mouse: Click any clip card in the filmstrip, or any block on the overview bar, to select it and jump to it in the video player.
With the keyboard:
The video loops the selected clip automatically so you can watch it as many times as you need.
After you tag a point, CutServe jumps to the next untagged clip, so you can work through a match without reaching for the mouse. See the Stat Tagging Reference for every stat.
Trimming Clip Timing
Every detected clip starts with the timing the engine found. It's usually close, but you'll often want to tighten the start or end by a second or two.
The Fastest Workflow: Keyboard Only
- Select a clip and watch it play
- At the exact moment the clip should start, press W. This sets the start point to wherever the playhead is right now
- Keep watching. At the exact moment it should end, press S. This sets the end point
You can move through an entire match tagging and trimming without touching the mouse.
Nudge buttons (mouse): If you prefer clicking, the Clipping panel has nudge buttons for fine-tuning:
| Key | Action |
|---|---|
| -1s | Move the point back 1 second |
| -.1s | Move the point back 0.1 seconds |
| Start Here/End Here | Set to current playhead position |
| +.1s | Move the point forward 0.1 seconds |
| +1s | Move the point forward 1 second |
All nudge keyboard shortcuts:
| Key | Action |
|---|---|
| Q | Nudge start back 1 second |
| Shift + Q | Nudge start back 0.1 seconds |
| E | Nudge start forward 1 second |
| Shift + E | Nudge start forward 0.1 seconds |
| A | Nudge end back 1 second |
| Shift + A | Nudge end back 0.1 seconds |
| D | Nudge end forward 1 second |
| Shift + D | Nudge end forward 0.1 seconds |
Trashing and Restoring Clips
Not every detected clip is worth keeping. If a clip is a false positive, a duplicate, or just not good enough, trash it.
- To trash a clip: Click the ✕ button on its filmstrip card, or press Backspace with the clip selected.
Trashed clips turn gray and are excluded from export. They stay in the timeline so you can bring them back.
- To restore a clip: Click the ↩ button on a trashed clip's card.
Adding Clips
If detection missed a point, add it yourself:
- From the filmstrip: Hover the gap between two clip cards and click the + that appears. CutServe inserts a short clip in that gap.
- From the keyboard: Press N to insert a clip after the selected one (or at the end if nothing is selected).
The new clip is selected and starts playing. Set its real start and end with W and S, then tag it.
Starring Highlights
Press F or click the star on a clip card to mark it as a highlight. Starred clips are pre-selected when you open the Highlight Reel.
Adding Text Overlays
If a rally would be unclear to viewers without extra context, add a short text overlay to that clip (for example, HIGH REDO or OOB).
- Select a clip, then click + Text Overlay under the overview bar (or press T).
- In the modal, choose one of the common labels or type your own text.
- On export, the text appears at the end of that clip. In Broadcast Pro and Worlds it's shown as a lower-third callout.
Adding a Replay
Press R or click Add Replay in the Clipping panel to add a slow-motion replay to the selected point. Clips with a replay show a speed badge on their card. See Replay Studio for details.
Saving, Undo and Redo
CutServe autosaves your clip list, timing, stat tags and overlays every few edits and whenever you leave the editor, and shows Saving… and Saved in the score bar. Click the Save button in the score bar to save immediately. You can close the app and pick up exactly where you left off.
- Undo: ⌘Z on Mac, Ctrl+Z on Windows, or the arrow buttons in the score bar.
- Redo: ⌘⇧Z on Mac, Ctrl+Shift+Z on Windows.
Settings and Keybinds
Settings lets you rename the project and change teams, players, the first server and receiver, and the serving style. Keybinds shows every shortcut and lets you rebind any of them. See Keyboard Shortcuts for the full list.