Setting Up Your Serving Zones
Zones are the most important step in getting accurate results. They tell the AI exactly where players start each point, so it knows when a serve is happening, who's serving, and where to look for rally action. Take your time here. You can, and should, use multiple frames (ideally four, one for each serving position). A well-drawn set of zones leads to noticeably better clip detection.
What Are Zones?
In roundnet, every point starts with one player serving from one of four positions around the net. CutServe needs to know where those four positions are in your specific video, because camera angle, distance, and court setup vary every time.
You'll draw four trapezoids, one for each serving position. For each zone, draw around the server in that position.

Finding the Right Frames
Before you draw each zone, scrub to a frame where the court is clearly visible and the server for that position is in a natural pre-serve stance.
You can do this on one frame, but for best results you should move the timeline between zones and use multiple frames, ideally one frame per serving position.
Tips for picking a good frame:
- Look for a frame at least 2 minutes into the video, after teams have settled into the match
- Pick a moment right before a serve, when the server is in a natural starting position
- Use different frames if one position is clearer later in the match
- Avoid frames where players are mid-movement, jumping, or walking between points
Use the Frame Picker scrubber at the bottom of the Zone Setup screen to seek through your video as you move from zone to zone. You don't need to be precise to the exact second, any frame that gives you a clear, still pre-serve view works.

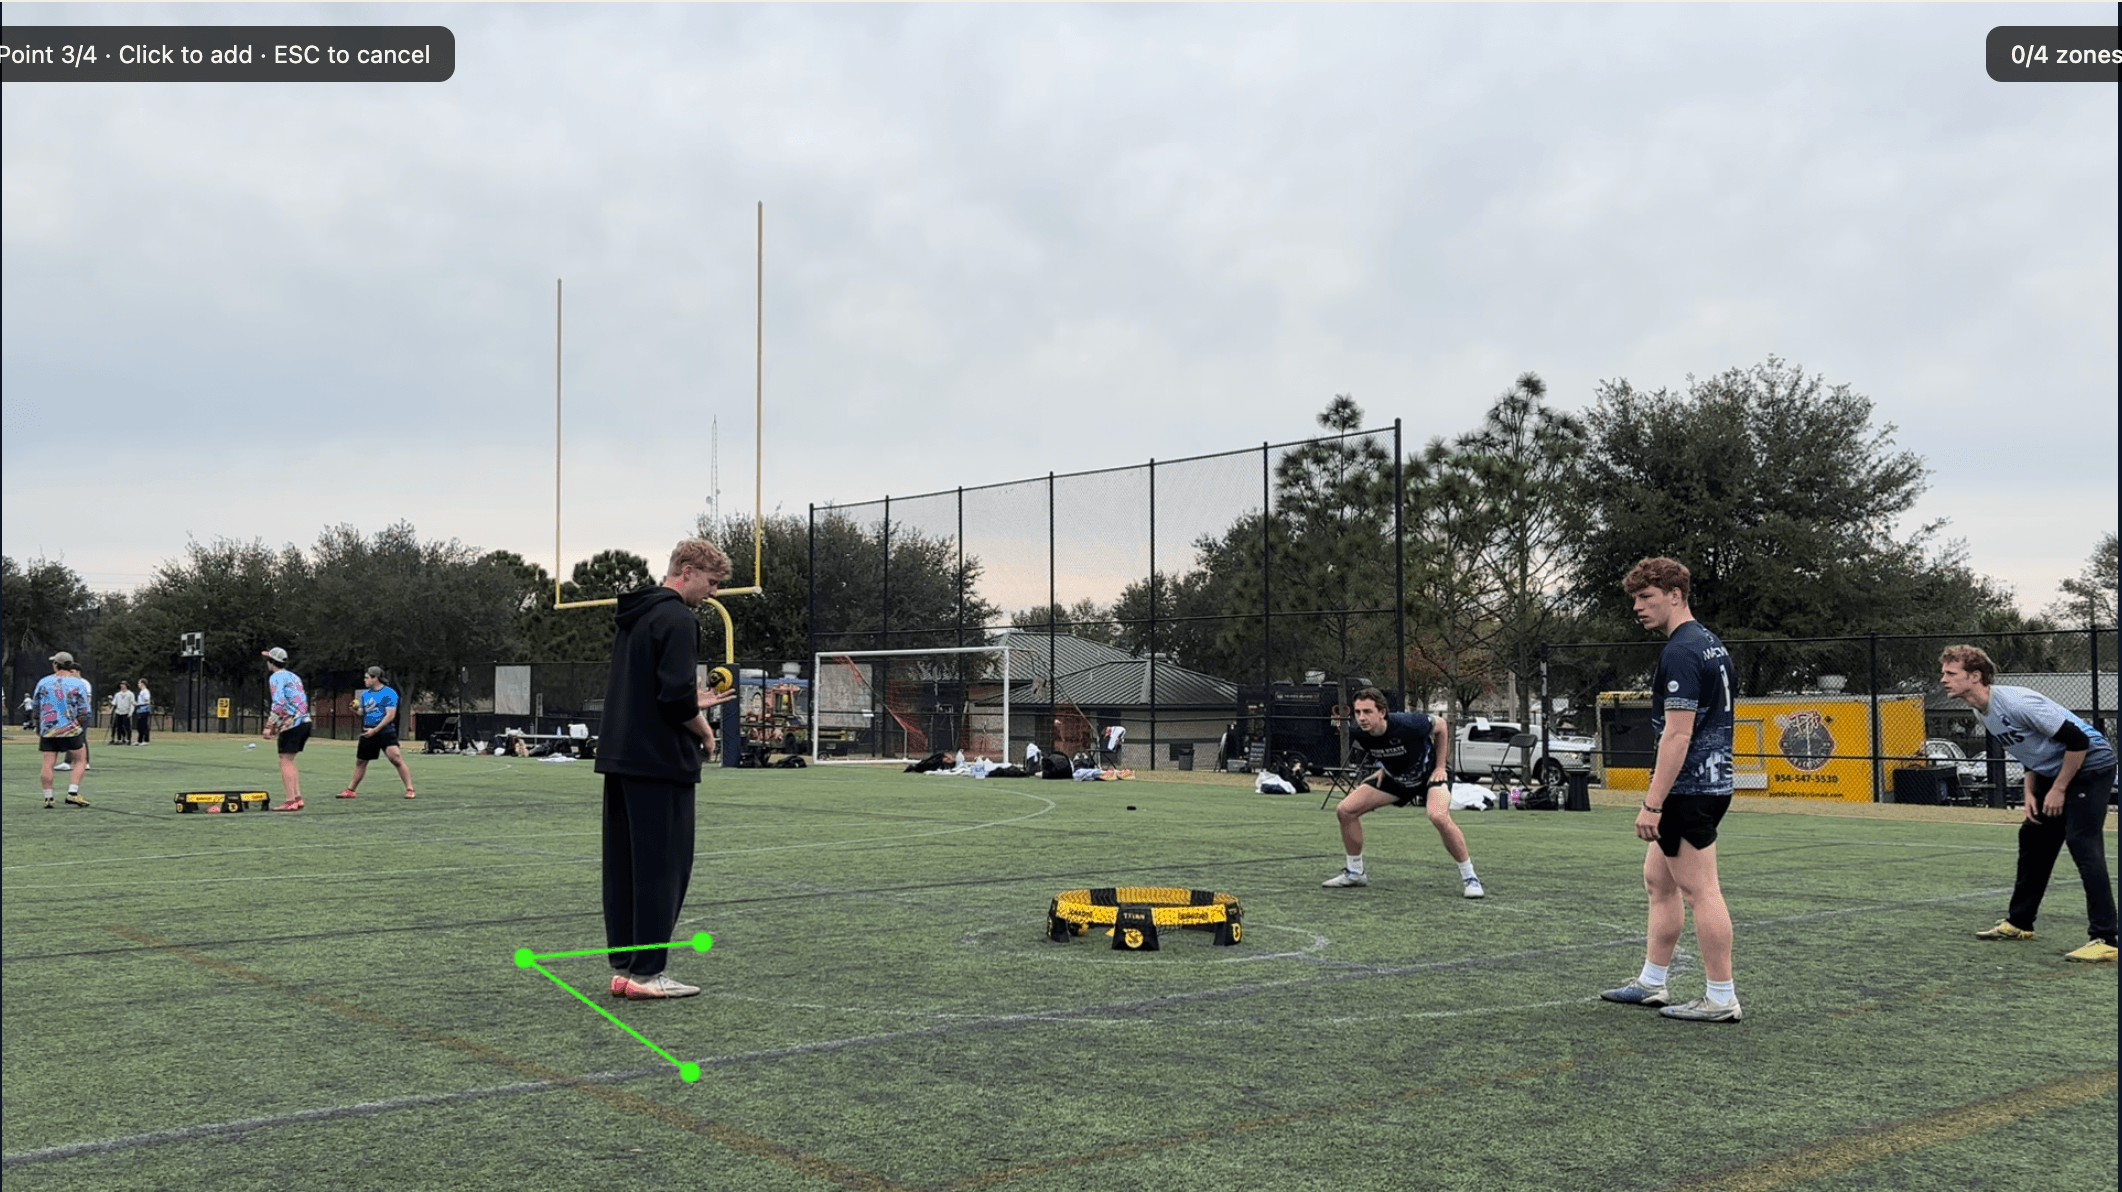
How to Draw a Zone
Each zone takes four clicks, one for each corner of the trapezoid.
- Click at the first corner of the zone
- Click at the second corner
- Click at the third corner
- Click the fourth and final corner, and the zone closes automatically
The zone fills in with a tinted overlay and gets labeled with its number. Repeat for all four positions.
Keyboard Shortcuts While Drawing
How Big to Make the Boxes
Make them slightly generous. This is the single most important thing to get right.
The zone should cover the full area the server might occupy when starting a point from that position, not just where their feet are in one specific frame. Players shift, lean, and approach the net slightly differently on every serve.
Serving position
The box should comfortably contain the server's entire feet and shins, with a few extra inches of margin on each side. If the server takes a small step before releasing, that step should still land inside the zone.
Receiver coverage
At minimum, at least one foot of the receiver must be inside the box at the moment of serve. When in doubt, draw the box larger, because a zone that's slightly too big causes far fewer missed clips than one that's slightly too small.
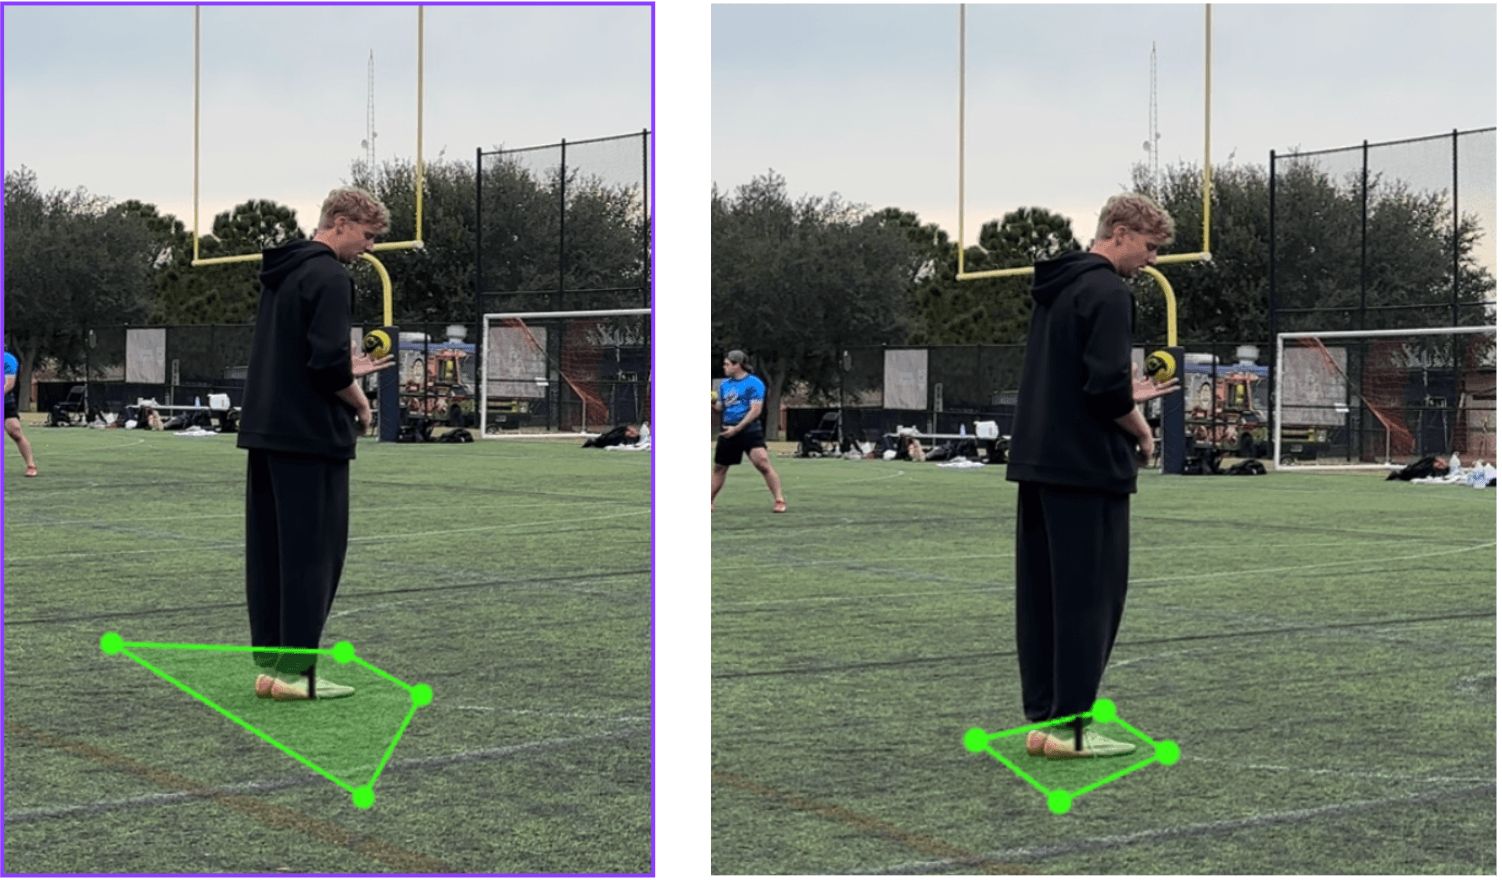
The trapezoid shape
Zones don't have to be perfect rectangles. Because of camera perspective, the court looks wider at the front and narrower toward the back. Draw your zones to match what you actually see on screen, a natural trapezoid shape that follows the perspective of the footage.

A Note on All Four Positions
The four zones correspond to the four starting positions in a standard roundnet game:
- Two diagonal positions for Team 1 (one server, one partner)
- Two diagonal positions for Team 2 (one receiver, one partner)
Draw them in any order. CutServe doesn't assign zone numbers to specific players; it uses all four together to understand when a serve is starting.
Check Your Zones Before Continuing
Before you click Continue →, skim through several serves in the timeline and confirm your zones still fit what you see on screen. This quick check is the best way to catch missed coverage early.
- Scrub through different rallies and verify each server stays inside the intended trapezoid
- If a zone looks too tight on later serves, slightly expand it before processing
- Prioritize consistent coverage over perfect visual symmetry
Common mistakes to avoid
- Drawing zones too tight around feet in a single frame
- Using only one frame even when other positions are clearer later
- Drawing on a receiver instead of the server for that zone
Finishing Zone Setup
Once all four zones are drawn, the Continue → button activates. Click it to save your zones and start the AI processing step.
Processing runs in the background. You'll see a progress indicator on the project card in the dashboard. Depending on video length and your Mac's speed, it typically takes a few minutes per hour of footage.